A WordPress plugin is a piece of software that “plugs into” your WordPress site. Plugins may add new functionality to your site or extend current functionality, allowing you to construct nearly any type of website, from ecommerce stores to portfolios to directory sites.
It is not beyond your capabilities to create a WordPress plugin. A plugin may be created by anyone who can write basic PHP and alter a theme.
Why Would I Want To Build A Plugin?
All WordPress themes include a functions.php file that contains code that adds all of your site’s functionality. It functions in the same way as a plugin does. You can put the same code in a plugin or a functions.php file, and both will work.
Imagine this
You’ve chosen to update the feel and look of the website, therefore you’ll need to change the theme; the custom code you inserted will no longer operate because it was present in the prior theme. Plugins, on the other hand, are not theme-specific, which means you may switch themes without losing the plugin’s functionality. Using a plugin rather than a theme makes the functionality you wish to provide easier to maintain and will not be affected by theme updates.
How do I create a WordPress plugin?
While various plugins will need different levels of code and expertise, they all tend to follow the same development process. Let’s have a look at how to make a WordPress plugin in six steps.
First Step: Set Up a Testing Environment
The first step is to set up a testing environment. a local environment or staging site because we’re not going to test our new plugin on an active website.
Second Step: Create a folder
Then, make a new folder for your plugin and give it a unique name that includes lowercase letters and dashes, such as my-powerful-plugin.
Third Step: Create a new file
Create a new file in your text editor and save it as my-powerful-plugin.php or my-first-plugin.php in your plugin folder. The .php extension is necessary, but you may name the file whatever you like.

Next open the PHP file with your preferred text editor and add the following information:
<?php
/*
Plugin Name: My First Plugin
Plugin URI: https://motasemodeh.com
Description: A short little description of the plugin. It will be displayed on the Plugins page in WordPress admin area.
Version: 1.0
Author: Motasem Odeh
Author URI:  https://motasemodeh.com
License:  GPLv2 or later
License URI: https://www.gnu.org/licenses/gpl-2.0.html
*/
Of course, you’ll need to change the above information to match your details. When you’re ready, you can save your file.
Fourth Step: Add Code to Your Plugin
In this Article I’m going to create a very simple plugin just to make it easy for you, our plugin will be about removing the admin bar from the frontend of the website.
// Remove the admin bar
add_filter( 'show_admin_bar', '__return_false' );
Now you need to save your file
Fifth Step: Package your Plugin
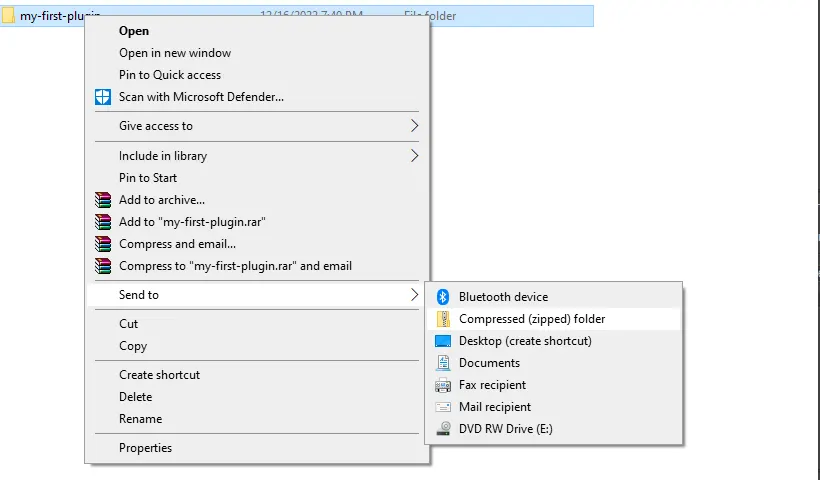
Now go to the desktop on your computer and add your plugin folder to a zip file.

Sixth Step: Install and Activate Your First WordPress Plugin
Go to your website’s WordPress admin area and navigate to the Plugins > Add New.

To upload your plugin, click the ‘Upload Plugin‘ button at the top. This displays the plugin upload box.
Select the zip file you just prepared by clicking the Choose File button. Then, to upload and install the plugin, click the Install Now option.
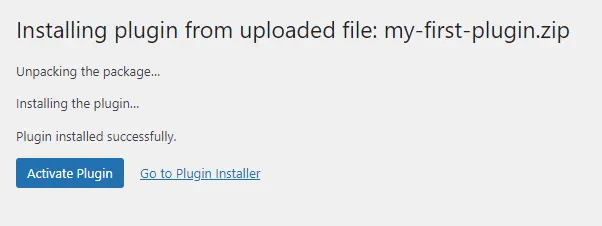
After you’ve installed it, Click on Activate Plugin as shown below.

You can now visit your website to see the plugin in action. You will be able to see that the Admin bar is gone.

Conclusion
WordPress plugins might be as basic as the one shown above. They can also be far more powerful, such as eCommerce plugins, membership plugins, contact form plugins, or photo gallery plugins.